Run the setup wizard
The setup wizard is Formis's guided path to create your first project, deploy starter forms, name your company, and invite the project team. Open it from the first-sign-in redirect or from Projects via Guided setup, then complete each sheet in order until the Ready sheet sends you to the dashboard.
This walkthrough uses the Request for Information (RFI) form from your construction starter pack. Your Formis tenant's forms may use different fields and names because Formis forms are configured to how you run the work.
You need a Tenant Admin or Manager seat and an active Formis subscription.
What the wizard covers
On first run (a new Formis tenant with no projects and no forms yet), the wizard walks through five sheets:
- Your first project. Name and code for the project you are running now.
- Starter forms. Pick published forms to deploy to that project. In this example, include Request for Information.
- Your company. Set the company name your team sees on invites and documents.
- Your project team. Fill workflow roles (named project roles your forms require, such as Project Manager) required by the forms you deployed (for RFI, that often includes a Project Manager).
- Ready. Review what you created and go to your dashboard.
When you add another project later with Guided setup, the wizard shortens to four sheets (company is skipped).
How to open the wizard
- First sign-in: When your tenant has no projects and no forms yet, Formis redirects you from the dashboard to
/setupautomatically (Tenant Admin or Manager). - Later projects: On Projects, click Guided setup. If you have no projects yet and land on the empty state, use Set up your first project. Both open
/setup?mode=project. - Power-user aside: You can also open
/setup?mode=projectdirectly in the browser.
New Project on Projects opens the create-project dialog. It does not start the setup wizard.
Run the setup wizard
Open Setup from the first-run redirect, or open Guided setup from Projects for an additional project. Complete each sheet below.
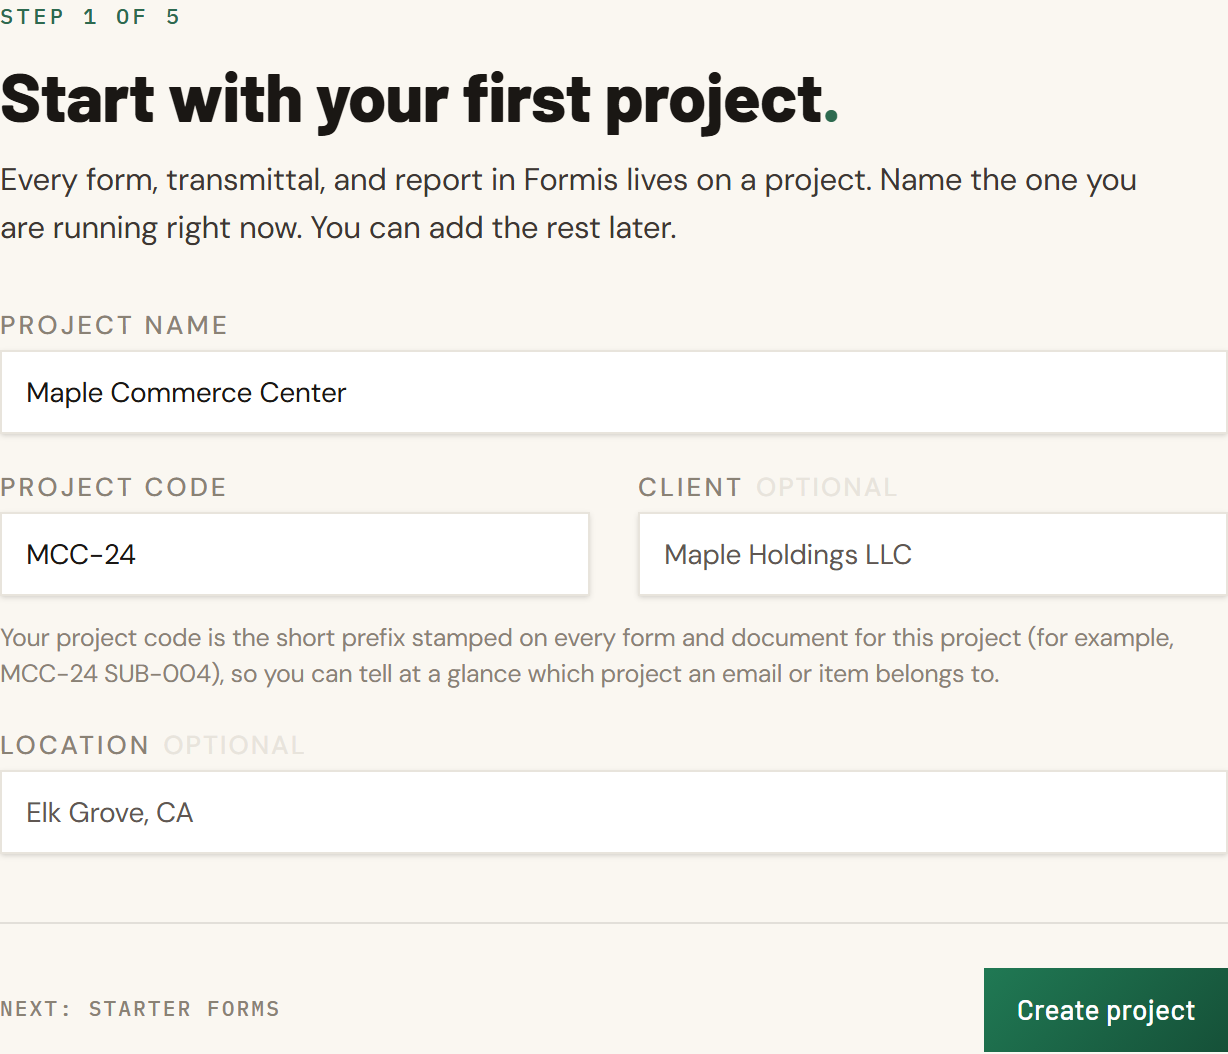
Sheet 1: Your first project
(Or New project in guided mode.)
- Enter Project name (for example, Maple Commerce Center).
- Enter Project code (for example, MCC-24). This prefix appears on form numbers and documents for the project.
- Optionally fill Client and Location.
- Click Create project.
Sheet 2: Starter forms
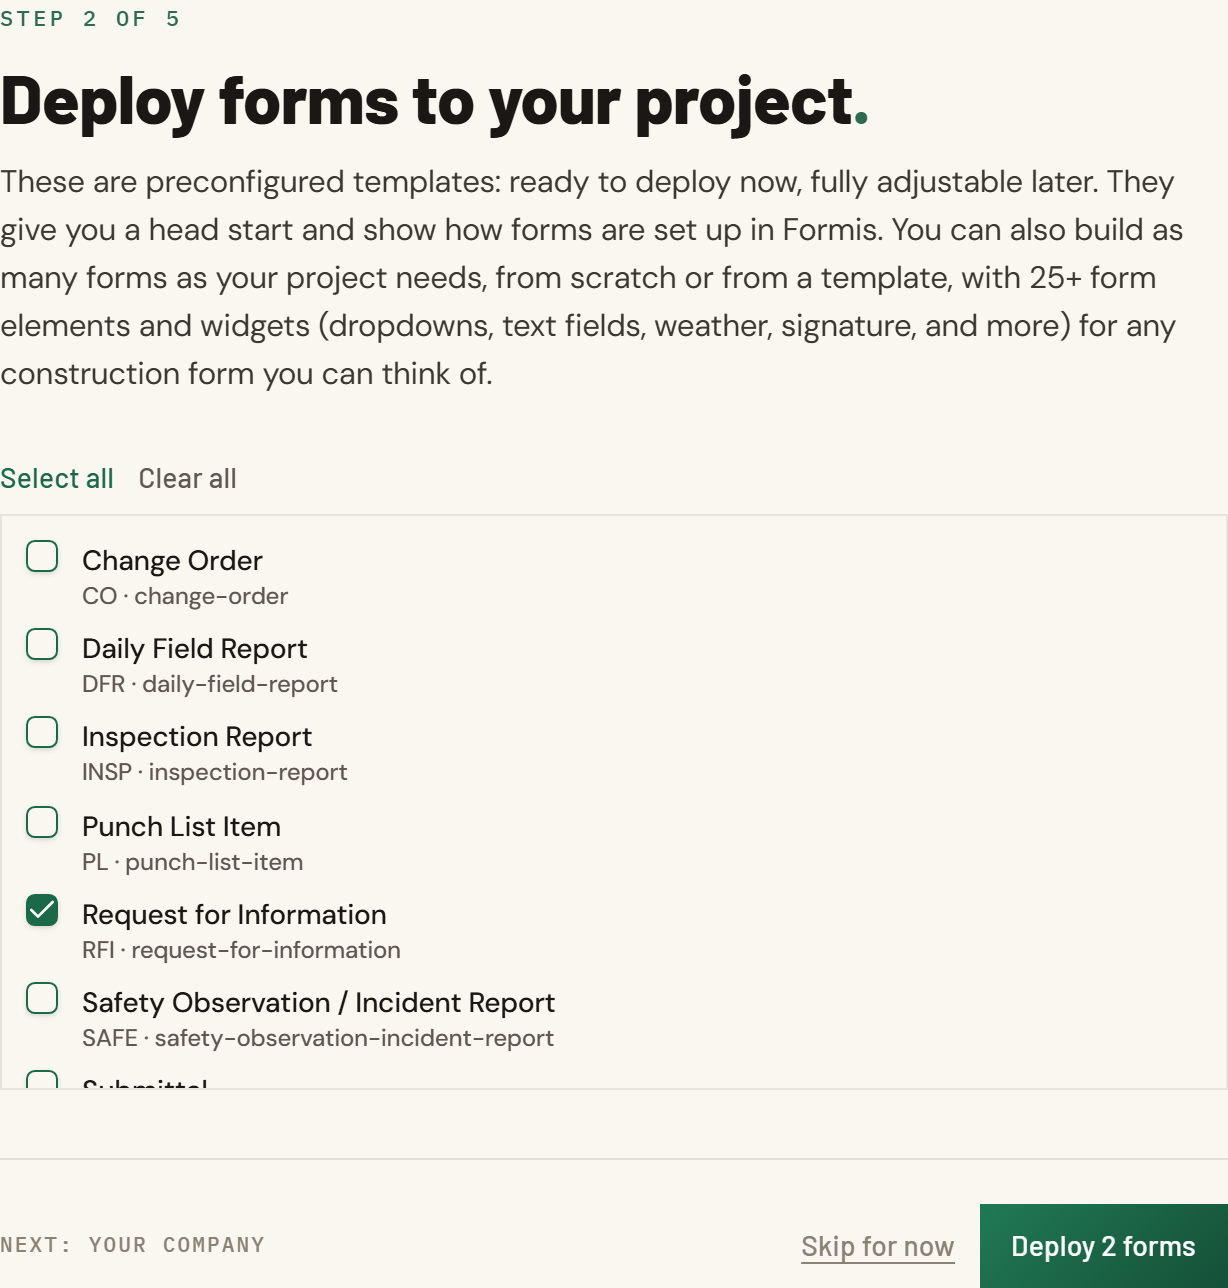
- Review the list of published forms. Use Select all or Clear all, or check individual forms.
- Check Request for Information so the project can take RFIs.
- Click Deploy N form(s) when you are ready, or Skip for now if you have no published forms yet.
Sheet 3: Your company
First-run only. Skipped in guided project mode.
- Enter Company name and read the company model copy on the page.
- Click Save company.
Sheet 4: Your project team
Step 3 in guided project mode.
- Formis lists each workflow role your deployed forms need. For each row, enter an email, pick a seat, or choose Add me to assign yourself.
- Use Invite user to add optional invite rows beyond the required roles.
- Click Send invitations when required roles are filled, or Skip for now if you will invite people later from Team.
Sheet 5: Ready
Step 4 in guided project mode.
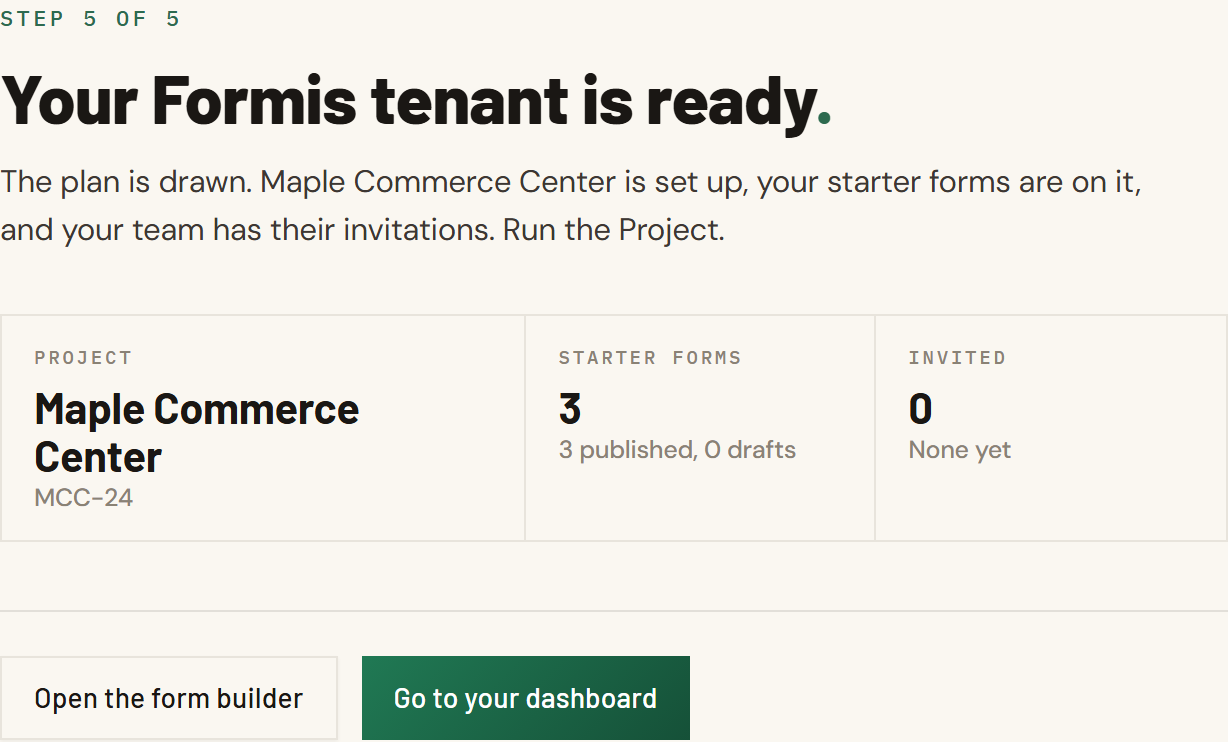
- Review the summary (project, deployed forms, company when shown, invites sent).
- Click Go to your dashboard to open the home page, or Open the form builder to create a form right away.
You can leave optional fields blank on Sheet 1 and still continue.
If deploy fails, read the amber message on Sheet 2 and try again after publishing forms from Forms.
Required workflow roles come from the forms you selected. If you skipped deploy, the invite sheet may show fewer roles.