Configure routing and approvals
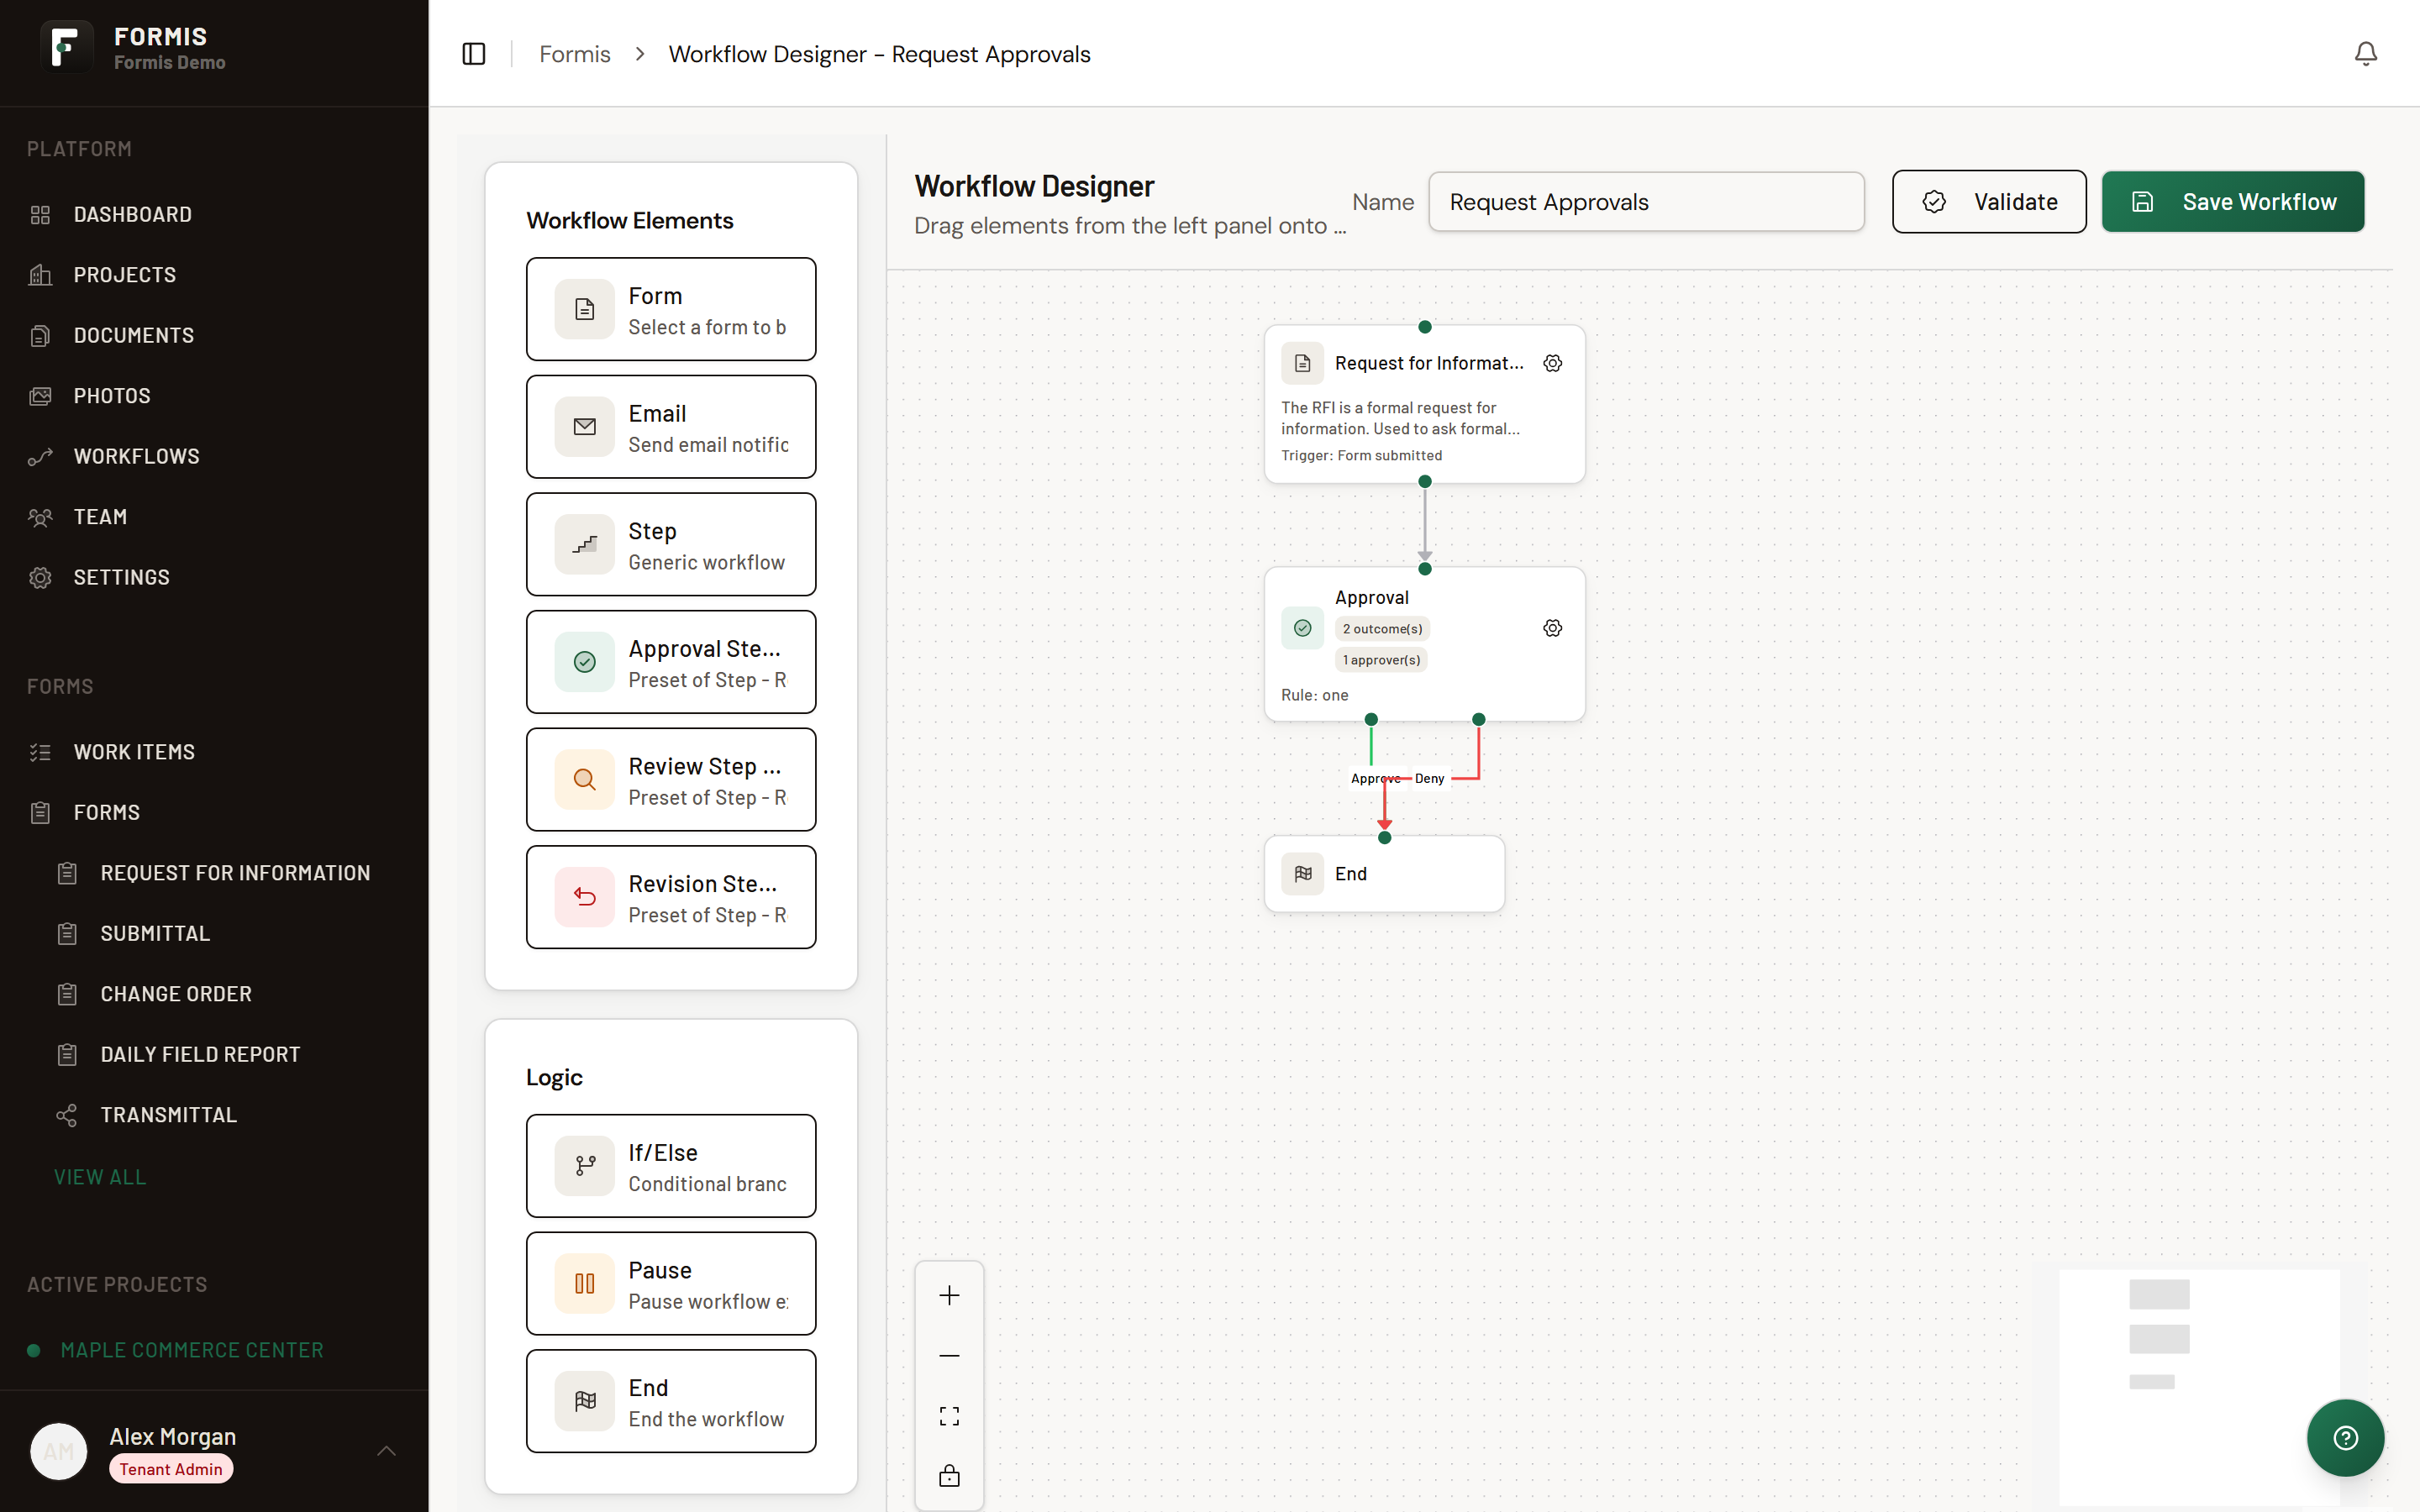
Configuring routing and approvals means binding a workflow to a form so new submissions get the right reviewers and sign-off. In Workflows, start from scratch, bind the Form node to your form, add an Approval step with Project Manager as assignee, connect Approve and Deny to End, then Save Workflow.
This walkthrough uses the Request for Information (RFI) form from your construction starter pack. Your Formis tenant's forms may use different fields and names because Formis forms are configured to how you run the work.
Build a short approval path for Maple Commerce Center RFIs. After someone submits an RFI, the Project Manager approves or denies it, then the workflow ends.
Request for Information must be deployed to the project. A Project Manager project role must resolve to a real person on that project.
Open the designer and bind the Form node
Tenant Admins and Managers configure routing.
- Open Workflows (
/workflows). - On the Create Workflow tab, click Start from Scratch, then Get Started.
- The designer opens at
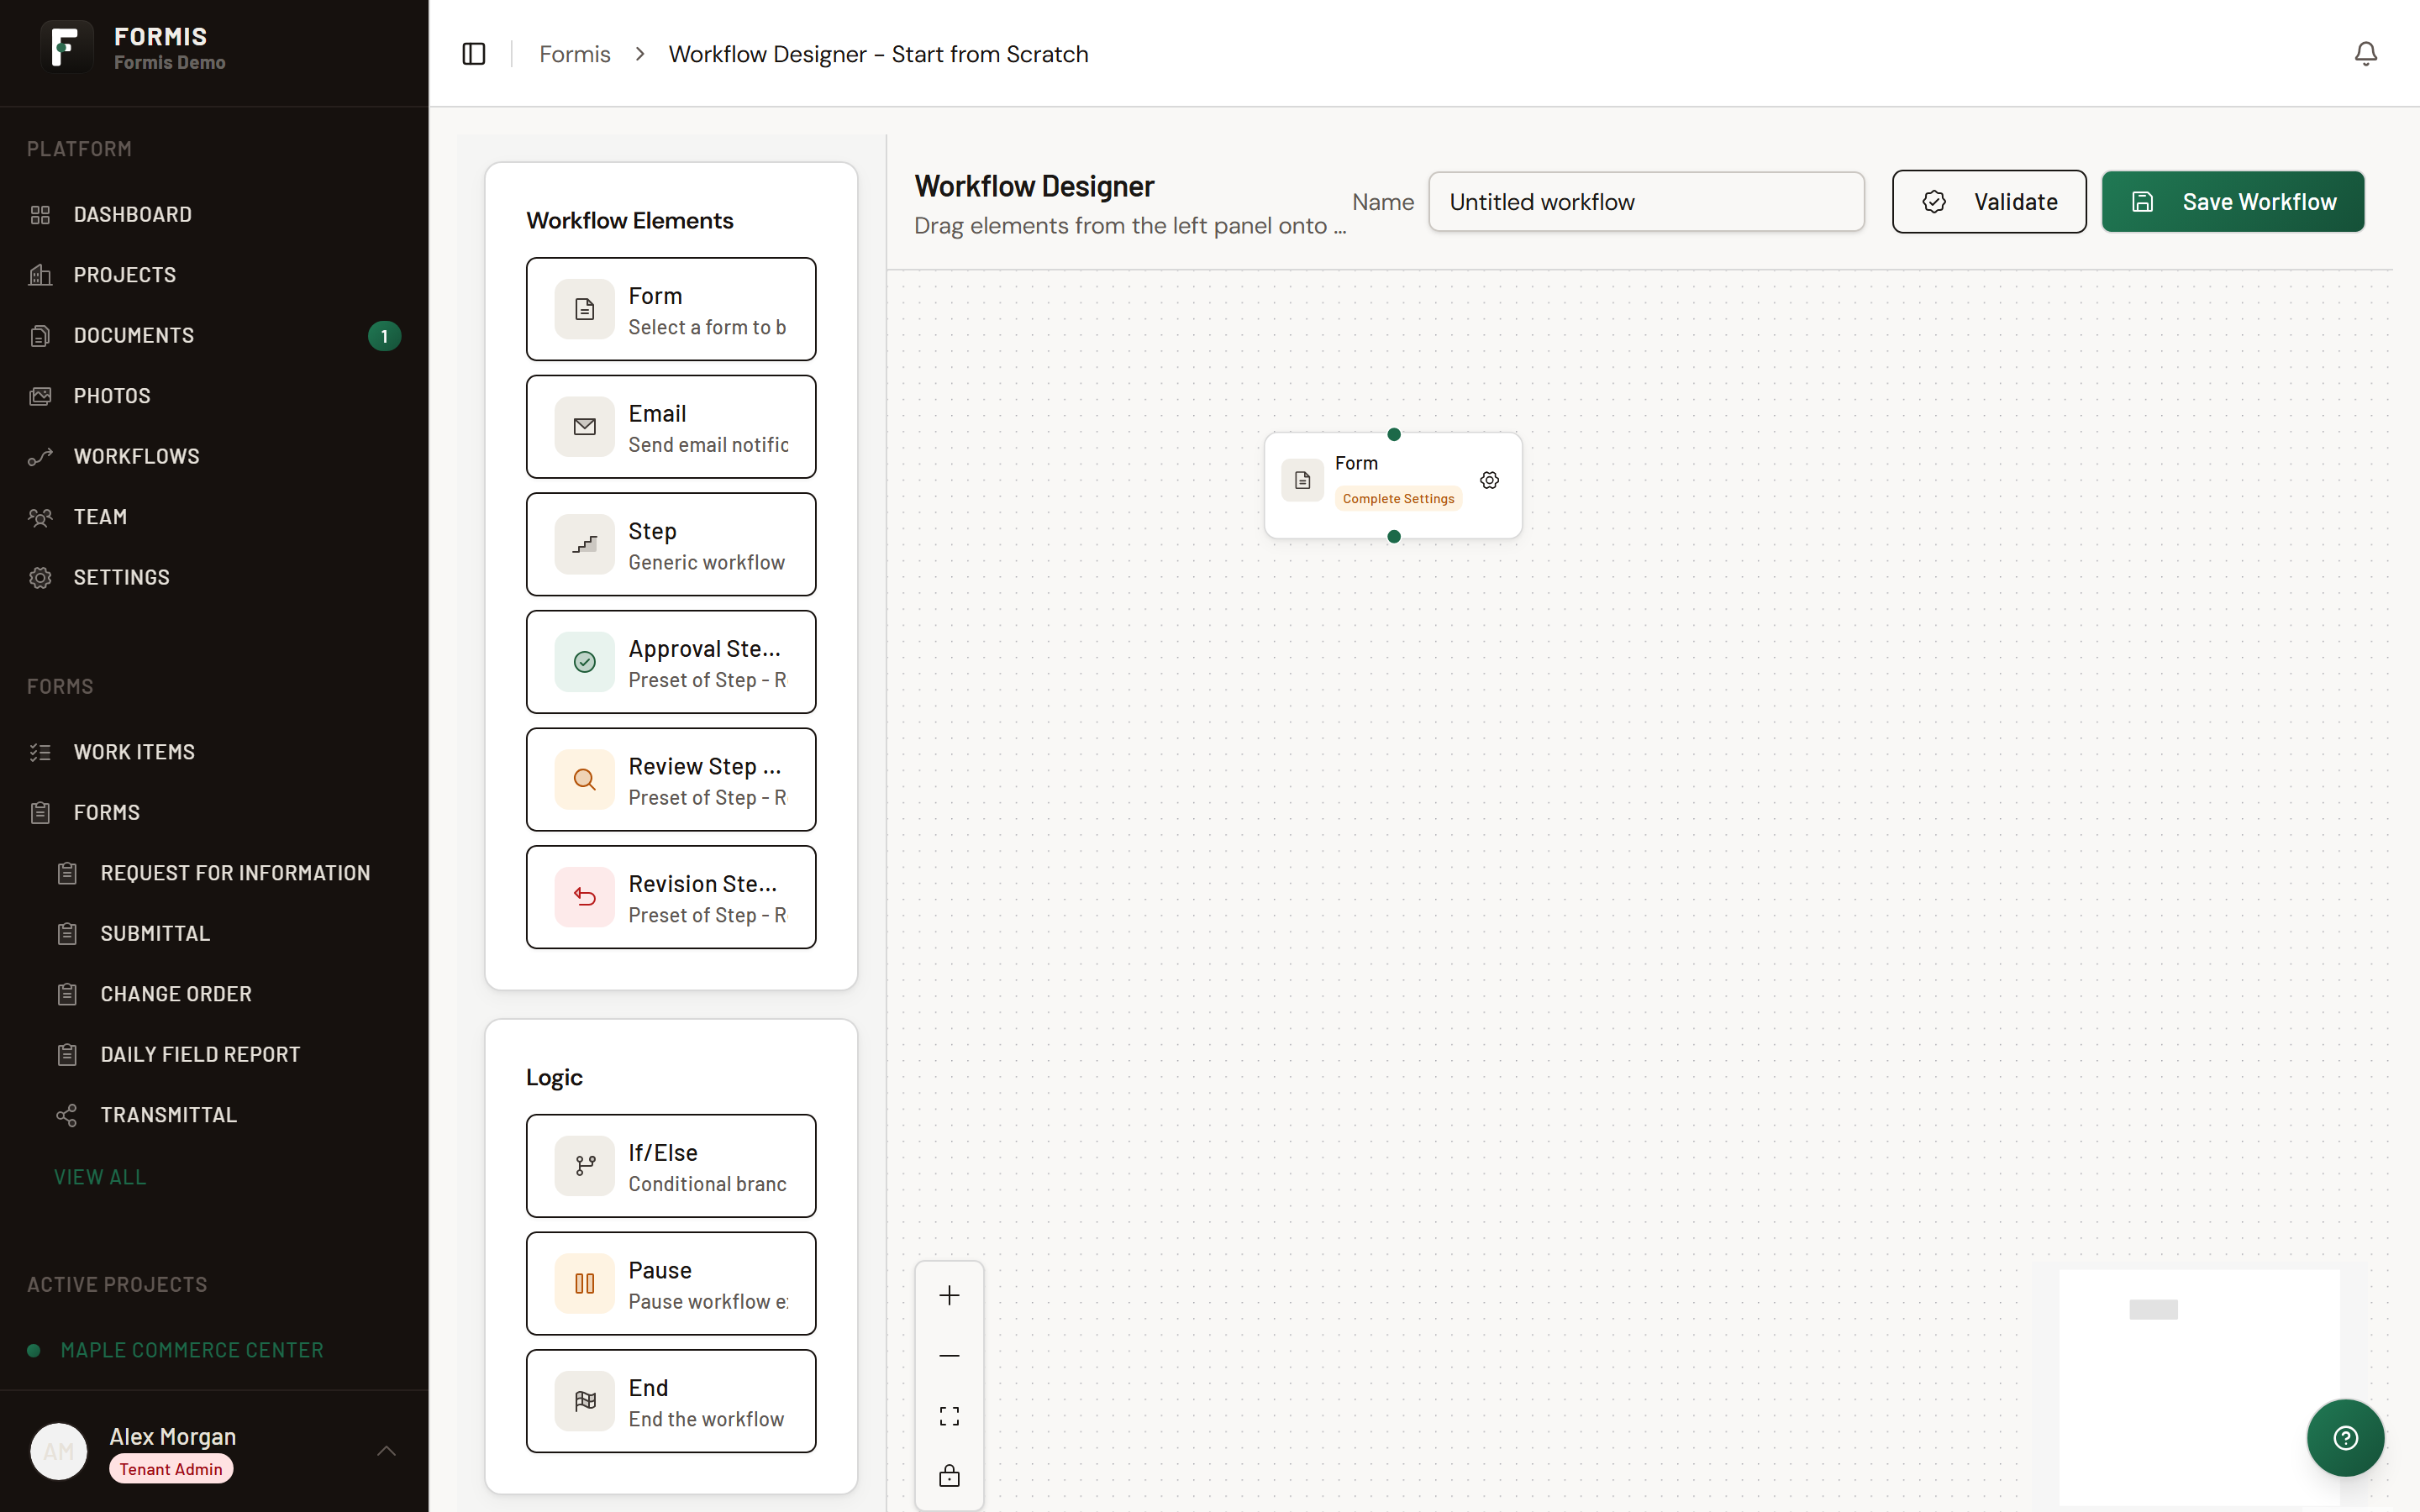
/workflows/designer. Workflow Elements (Form, Email, Step, Approval Step (Preset), Review Step (Preset), Revision Step (Preset)) sits on one side; Logic (If/Else, Pause, End) on the other. - Drag Form onto the canvas if a Form node is not already there (the Form node binds this workflow to a form). An unbound Form node shows Complete Settings.
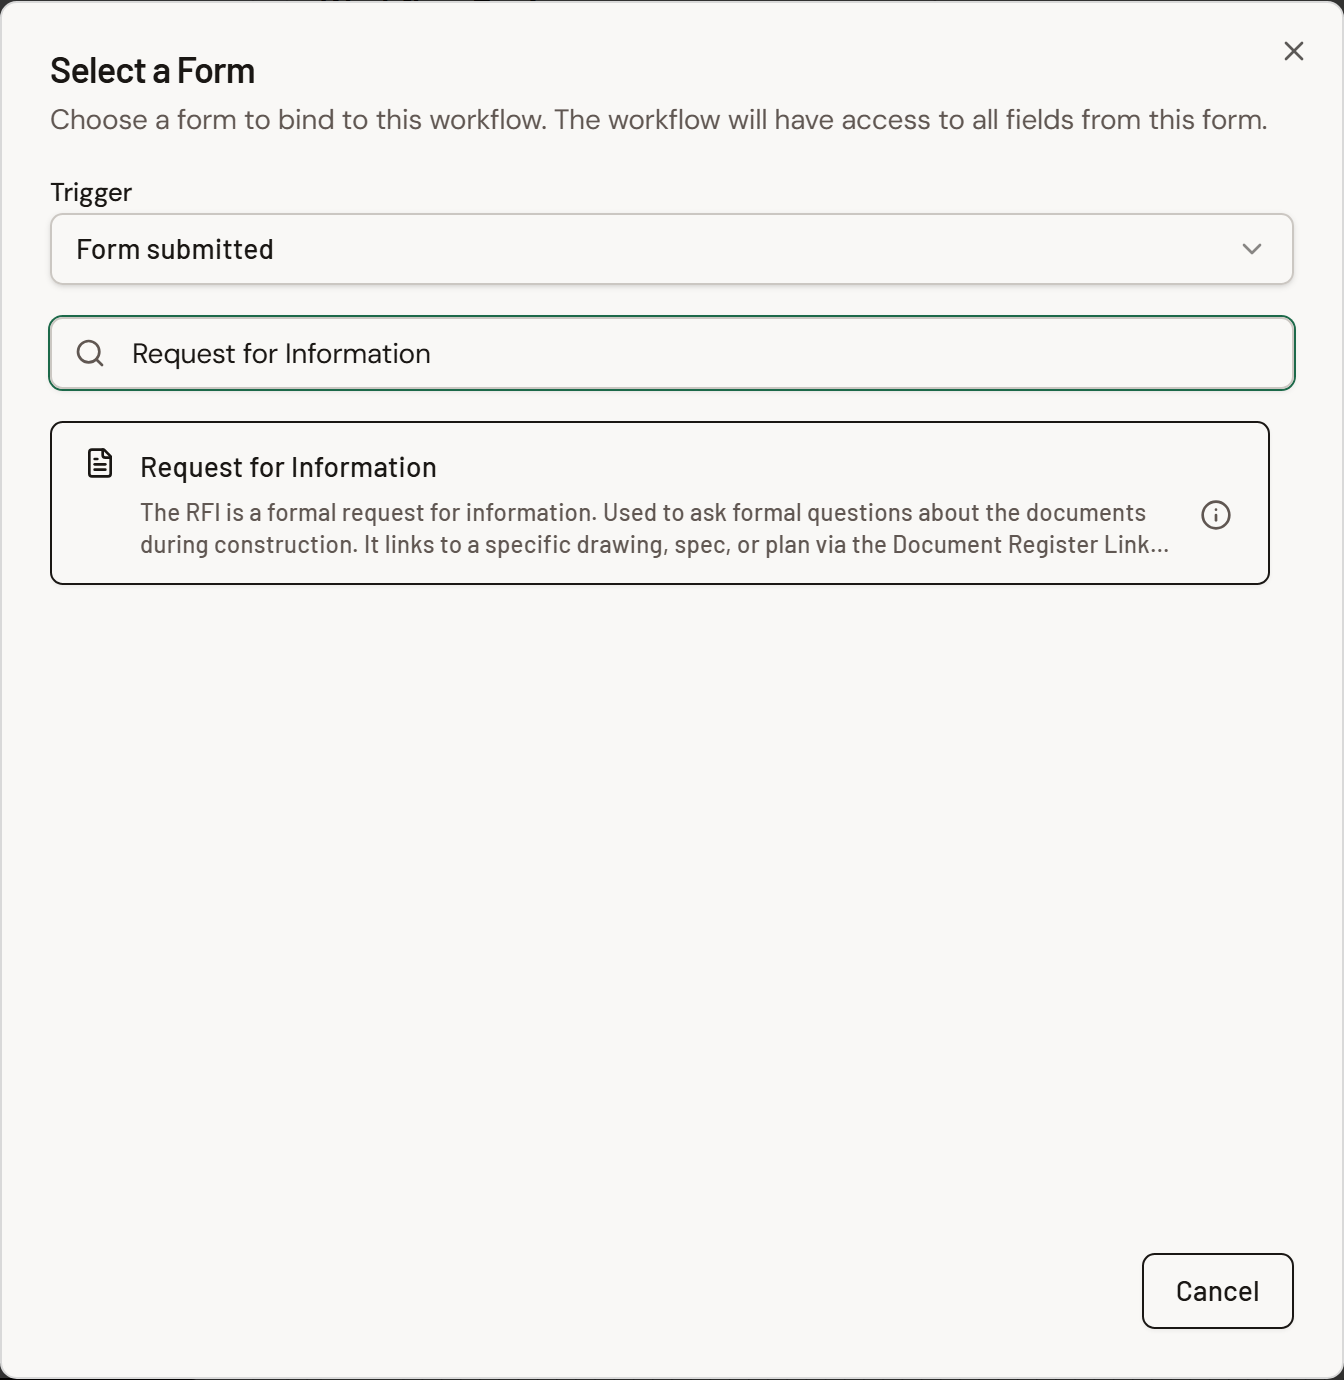
- Open the Form node settings. In Select a Form, set Trigger to Form submitted, search for Request for Information, select it, and confirm.
- Connect the Form node's bottom handle to the next step you will add.
You cannot save until this binding exists.
Build the path: Form, Approval, End
- From Workflow Elements, drag Approval Step (Preset) onto the canvas under the Form node.
- Draw a connector from the Form node down into the Approval step.
- From Logic, drag two End nodes onto the canvas, one for each default outcome.
- Double-click (or open settings on) the Approval step. The sheet title is Configure Approval. Default Step Title is Approval.
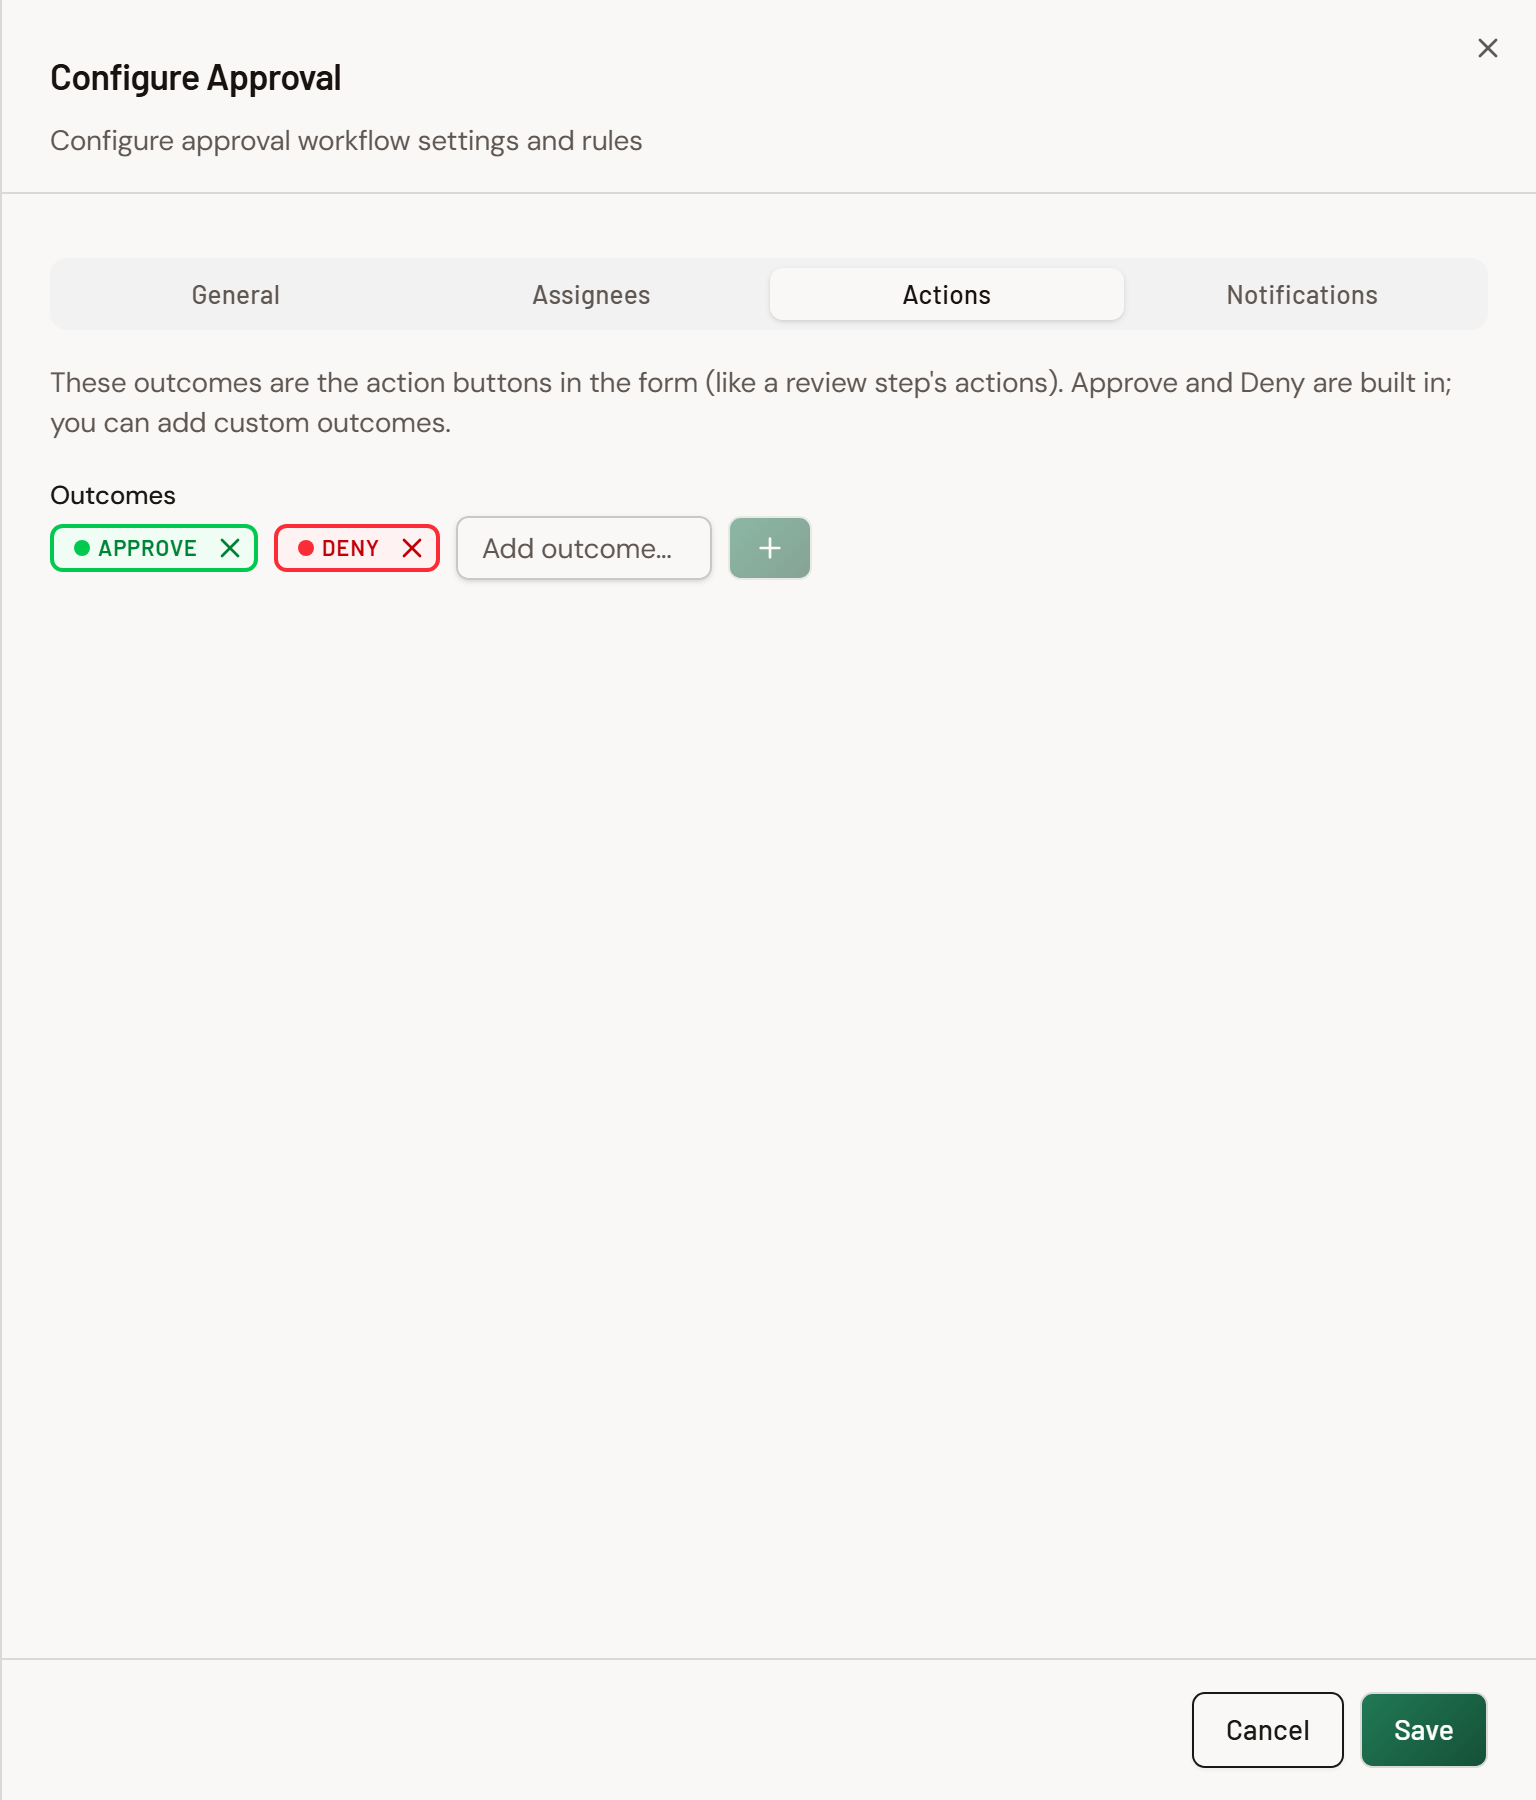
- Open the Actions tab. Default outcomes are Approve and Deny. You can type a custom name in Add outcome... and add it. Each outcome is a source handle along the bottom of the Approval node.
- Draw a connector from the Approve handle to one End node, and from the Deny handle to the other. Outcomes only advance when they are connected to a target.
Assignees
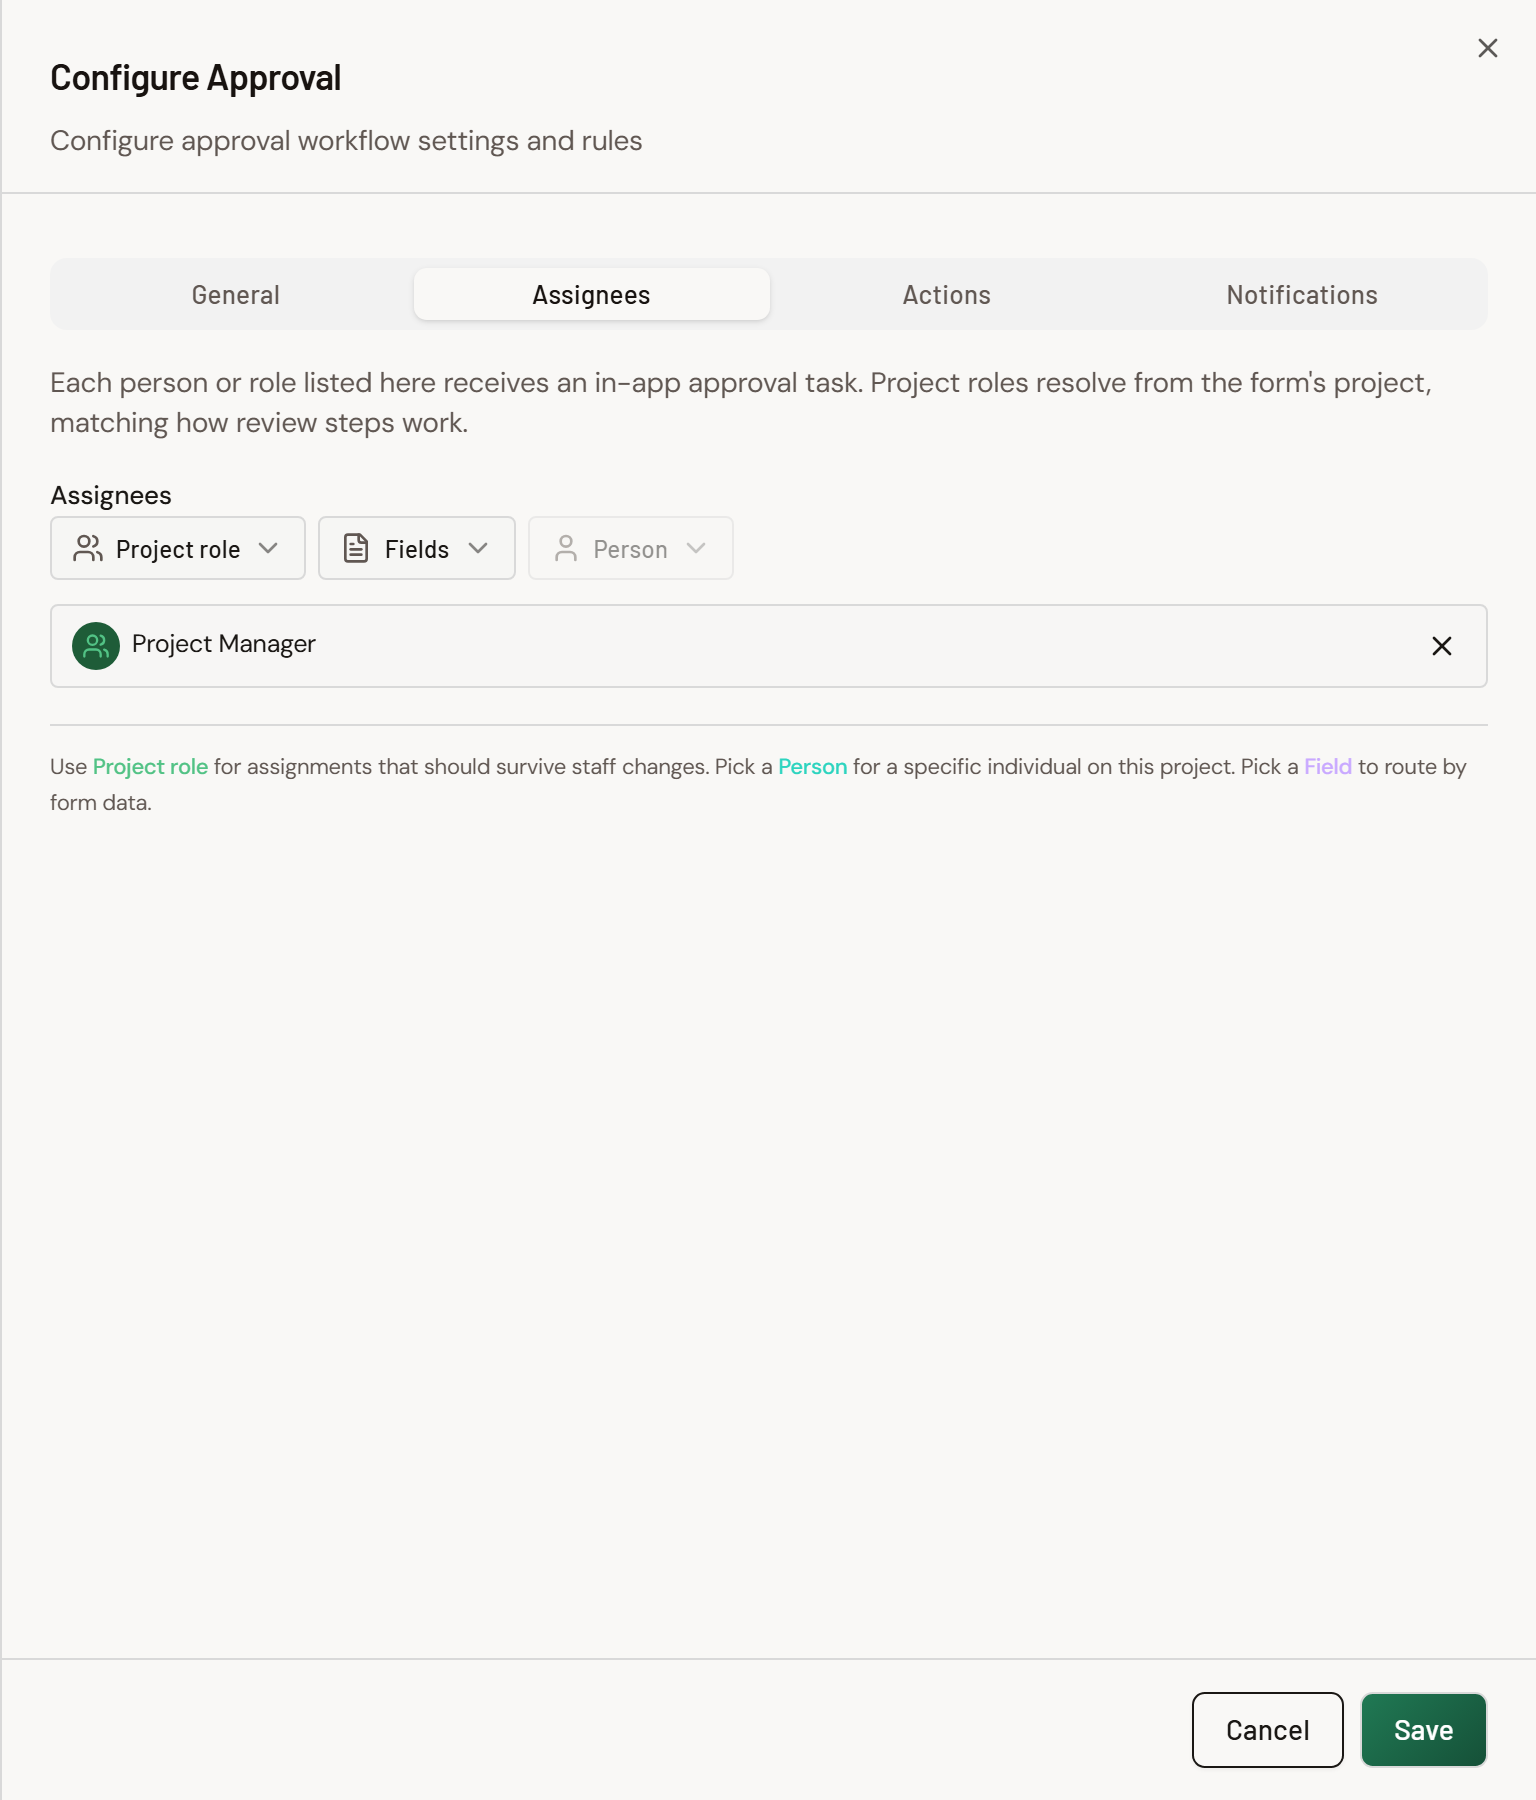
Stay in Configure Approval and open the Assignees tab. Each row listed here receives an in-app approval task. The three pickers at the top of the list are:
- Project role. Resolves from the project's team at run time. Use this for RFI PM sign-off: pick Project Manager so whoever holds that role on Maple Commerce Center gets the task.
- Fields. Uses a People Picker field on the bound form. The starter RFI has no intake assignee picker. It does have Select Reviewer and Responded by on Official Response. Use Select Reviewer when the PM forwards the RFI to named reviewers; do not use it as the first PM assignment.
- Person. A specific user already eligible on the form's project. Use this when one named person must always act, regardless of who holds a project role.
A fourth addressing type, External email, is not on this Assignees tab. It appears on Email-node Recipients when you need an address outside Formis.
Empty list copy: "No assignees yet. Pick a role, field, or person above."
For this walkthrough, click Project role and add Project Manager.
Approval configuration
Still in Configure Approval:
Actions tab (outcomes). Keep Approve and Deny for this RFI path. Add a custom outcome only if your process needs a third button (for example a label your team already uses). Connect every outcome you keep to a target node.
General tab (completion). Under Completion Rules:
- Require Response from One Person. One Project Manager acting is enough. Use this for a single PM on Maple Commerce Center.
- Require Response from All. Every listed assignee must respond. Use this if two PMs must both sign.
- Require Response from Majority. More than half must agree. Ties go to the first response that holds the majority.
- Require a Certain Number of Responses. Set Required Count (for example 2 of 3 reviewers). The count cannot exceed the number of assignees.
General tab (switches).
- Require Comments. Blocks finishing the task if comments are empty. Turn this on when you want a written reason on Deny.
- Allow Reassign. Lets the assignee send the task to another person. Turn this on when the named PM may be out of office.
Request More Information is not a live control on this sheet. Do not look for that switch here.
Advanced options (RFI)
These sit on Configure Approval → General unless noted. Keep them off for a first RFI save unless you already know you need them.
Escalation. Reassigns the step if it is not actioned in time. Set After and Unit (Hour(s), Day(s), Week(s), Month(s), or Custom Date), then Escalate To (Email). Escalation routing needs more than one assignee. Example: if the PM has not acted in two days, escalate to a backup address.
Expiration. Sends an overdue notification when the timer passes. It does not approve, deny, or advance the RFI. Example: notify after three days that the RFI is still waiting.
Automatically Finish Task. Advances to a chosen Outcome after the timer. Example: auto-Approve after seven days only if your contract allows silence-as-consent. Most RFI processes leave this off.
Send Reminder Emails. Up to three Rounds. Example: remind the Project Manager once a day, twice, while the RFI sits in Approval.
Notification Email (Notifications tab). Click Configure Email or Edit Email to change the message that goes out when the step starts. Assignees are included at send time.
Edit Policy and Status Category are not on Approval. They live on a Step, Review Step (Preset), or Revision Step (Preset) General tab: Read-Only, All Fields, or Allowlist Fields, plus Status Category values Under Review, Awaiting Approval, Revision Required, On Hold, and Complete. Use a Review step later if Official Response fields such as Response should become editable only after PM triage. Status Category also drives form Show/Hide Field conditions keyed on Workflow Status. Set the category on the step where you want a section to appear. See Show or hide fields with conditions.
Save and test
Saving requires a Form node bound to a form; an unbound scratch graph fails save with a message to configure the Form node first.
- Confirm the Form node shows Request for Information, Approval has Project Manager, and Approve/Deny each connect to an End node.
- Click Save Workflow at the top right of the designer.
- If save is blocked, the blockers dialog lists each issue. Bind the Form node, connect outcomes, and save again.
- Publish Request for Information if it is still a draft.
- On Forms, click New Submission on the RFI card. Fill RFI Title, RFI Question, Document Reference, and Priority, then submit. Confirm the Project Manager receives the Approval task and that Approve / Deny move the RFI to the matching End.
Next
Use If/Else from Logic when a later RFI path must branch on a form field (for example Priority). Parallel and heavily conditional workflows require a Pro or higher plan; save may fail with that message on a lower tier.
For review-step settings beyond this Approval walkthrough, see The anatomy of a review step.
Related
- Task List review workflow
- The anatomy of a review step
- Route a form to multiple reviewers and set completion rules
- Keep reviews moving: target durations, escalation, and reassignment
- Control what reviewers can edit: step edit policies
- Configure step actions and outcome severity
- Run the setup wizard
- Invite your team and assign seats
- Understand seats and project roles
- Build a form from scratch
- Install a form from the library
- Submit a form and track it
- Send a transmittal